Hyundai Santa Fe: Rear Suspension System / Rear Cross Member. Repair procedures
Hyundai Santa Fe (TM) 2019-2025 Service Manual / Suspension System / Rear Suspension System / Rear Cross Member. Repair procedures
| Removal |
| 1. |
Loosen the wheel nuts slightly.
Raise the vehicle, and make sure it is securely supported.
|
| 2. |
Remove the front wheel and tire (A) from the front hub.
|
| 3. |
Remove the rear brake caliper.
(Refer to Brake System - "Rear Disc Brake")
|
| 4. |
In the case of 4WD vehicle, remove the rear differential assembly.
(Refer to Driveshaft and axle - "Rear Differential Carrier")
|
| 5. |
Remove the center muffler.
(Refer to Engine Mechanical System - "Muffler")
|
| 6. |
Disconnect the rear wheel speed sensor connector (A).
[2WD]
|
| 7. |
Remove the rear wheel speed sensor (A) after loosening the mounting
bolt.
[4WD]
|
| 8. |
Loosen the wheel speed sensor cable bracket mounting nuts (A).
|
| 9. |
Loosen the wheel speed sensor cable bracket mounting bolts (A).
|
| 10. |
Remove the trailing arm (A) after loosening the mounting bolts.
|
| 11. |
Support the jack on the lower part of the cross member.
|
| 12. |
Loosen the bolt and nut and then remove the rear shock absorber (A)
from the lower arm.
|
| 13. |
|
| 14. |
Loosen the cross member mounting bolts (A).
|
| 15. |
Remove the rear cross member.
|
| 16. |
Remove the coil spring (A).
[LH]
[RH]
|
| 17. |
Remove the damper (A) after loosening the mounting bolts.
[LH]
[RH]
|
| 18. |
Remove the rear upper arm (A) after loosening the mounting bolts and
nuts.
[LH]
[RH]
|
| 19. |
Remove the trailing arm (A) after loosening the mounting nuts.
[LH]
[RH]
|
| 20. |
Remove the rear assist arm (A) after loosening the mounting bolts and
nuts.
[LH]
[RH]
|
| 21. |
Remove the rear carrier (A) from the rear lower arm after loosening
the mounting bolt and nut.
[LH]
[RH]
|
| 22. |
Remove the rear lower arm (A) after loosening the mounting bolts and
nuts.
[LH]
[RH]
|
| 23. |
Remove the rear stabilizer bar (A) after loosening the mounting bolts.
|
| Inspection |
| 1. |
Check the bushing for wear and deterioration.
|
| 2. |
Check for all bolts and nuts.
|
| Installation |
| 1. |
To install, reverse the removal procedures.
|
| 2. |
Check the alignment.
(Refer to Suspension System - "Alingment")
|
 Rear Stabilizer Bar. Repair procedures
Removal
1.
Raise the vehicle, and make sure it is securely supported.
2.
In the case of 4WD vehicle, remove the rear differential assembly...
 Tires/Wheels
..
Other information:
Hyundai Santa Fe (TM) 2019-2025 Service Manual: Roof Side Molding. Repair procedures
Replacement • Put on gloves to prevent hand injuries. • When removing with a flat-tip screwdriver or remover, wrap protective tape around the tools to prevent damage to components...
Hyundai Santa Fe (TM) 2019-2025 Owner's Manual: Child Restraint System (CRS)
Children Always in the Rear WARNING Always properly restrain children in the vehicle. Children of all ages are safer when restrained in the rear seat. A child riding in the front passenger seat can be forcefully struck by an inflating air bag resulting in SERIOUS INJURY or DEATH...
Categories
- Manuals Home
- 4th Generation Santa Fe Owners Manual
- 4th Generation Santa Fe Service Manual
- Gauges and meters
- Child-protector rear door locks
- Troubleshooting
- New on site
- Most important about car
Vehicle Identification Number (VIN). Vehicle certification label. Tire specification and pressure label
Vehicle Identification Number (VIN)

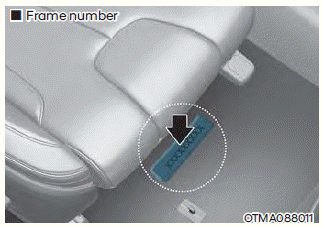
The vehicle identification number (VIN) is the number used in registering your vehicle and in all legal matters pertaining to its ownership, etc.
The number is punched on the floor under the passenger seat. To check the number, open the cover.
Copyright © 2025 www.hsafe4.com


