Hyundai Santa Fe: Automatic Transaxle Control System / Shift Lever. Repair procedures
Hyundai Santa Fe (TM) 2019-2025 Service Manual / Automatic Transaxle System (SBC) / Automatic Transaxle Control System / Shift Lever. Repair procedures
| Removal |
| 1. |
Turn ignition switch OFF and disconnect the negative (-) battery cable.
|
| 2. |
Remove the shift knob & boots.
|


| 3. |
Remove the floor console assembly.
(Refer to Body - "Floor Console")
|
| 4. |
Remove the floor console air duct (A) and then disconnect the connector
(B).
|

| 5. |
Remove the snap pin (A) and then separate the shift cable (B).
|


| 6. |
Remove the bolts and then shift lever assembly (A).
|

| Installation |
| 1. |
To install, reverse the removal procedure.
|

 Position Switch. Repair procedures
Inspection
▶ Inspection flow of the position switch
▶ Items to check
1.
Inspect DTC code.
2...
 Shift Cable. Repair procedures
Removal
1.
Make sure vehicle does not roll before setting shift lever to "N" position.
2...
Other information:
Hyundai Santa Fe (TM) 2019-2025 Service Manual: Crash Pad Lower Panel. Repair procedures
Replacement • Put on gloves to prevent hand injuries. • When removing with a flat-tip screwdriver or remover, wrap protective tape around the tools to prevent damage to components...
Hyundai Santa Fe (TM) 2019-2025 Service Manual: Power Seat Motor. Repair procedures
Inspection Power Seat Motor 1. Disconnect the connectors for each motor. (Refer to Body - "Front Seat Assembly") B : Rear height motor C : Front height motor D : Lumbar support motor (Horizontal) E : Lumbar supprot motor (Vertical) F : Recline motor 2...
Categories
- Manuals Home
- 4th Generation Santa Fe Owners Manual
- 4th Generation Santa Fe Service Manual
- Brake bleeding procedures
- Smart liftgate
- Child-protector rear door locks
- New on site
- Most important about car
Armrest
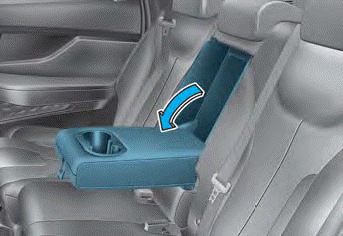
The armrest is located in the center of the rear seat. Pull the armrest down from the seatback to use it.

Copyright © 2025 www.hsafe4.com